Jenkins / GitHub Integration
In order to get Jenkins to kick of a job for each related GitHub commit, you need to set up several things in both Jenkins and GitHub. Let’s start with GitHub since there is a required access token you’ll need to generate and later save as a Jenkins credential. Basic details for this section come from the Jenkins GitHub Plugin reference
GitHub Updates
On GitHub we need to do a couple things:
Set up a webhook integration for our target repository
Create a Personal Access Token which will allow Jenkins to confirm that it’s activity is authorized
Setting up a GitHub Repo Webhook
Navigate to the GitHub repo that you want to connect to Jenkins and click on the repository Settings option. In ‘Settings’, you’ll see several options in the left-hand menu, one of which is Webhooks
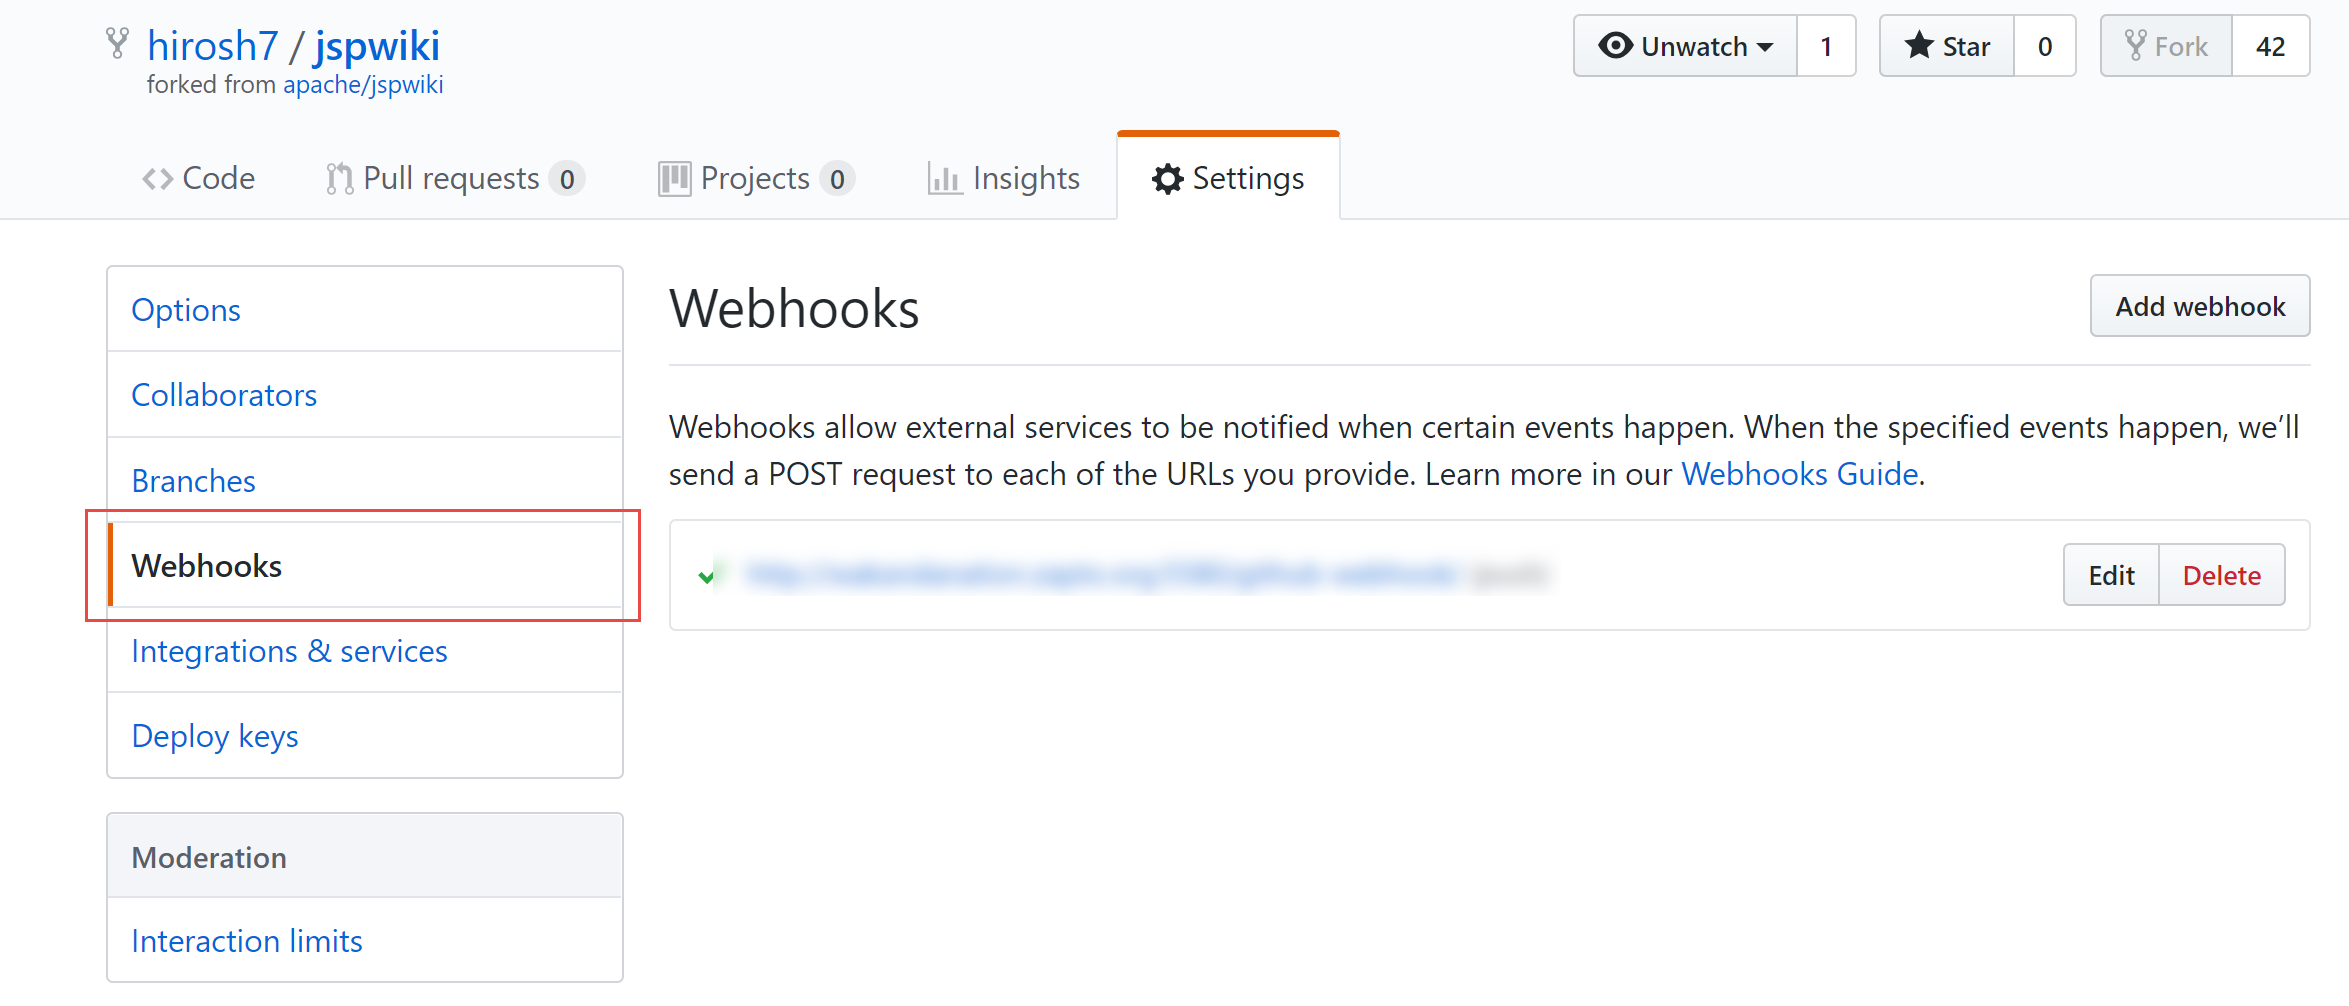
Click on the Add Webhook button to bring up the associated dialog.
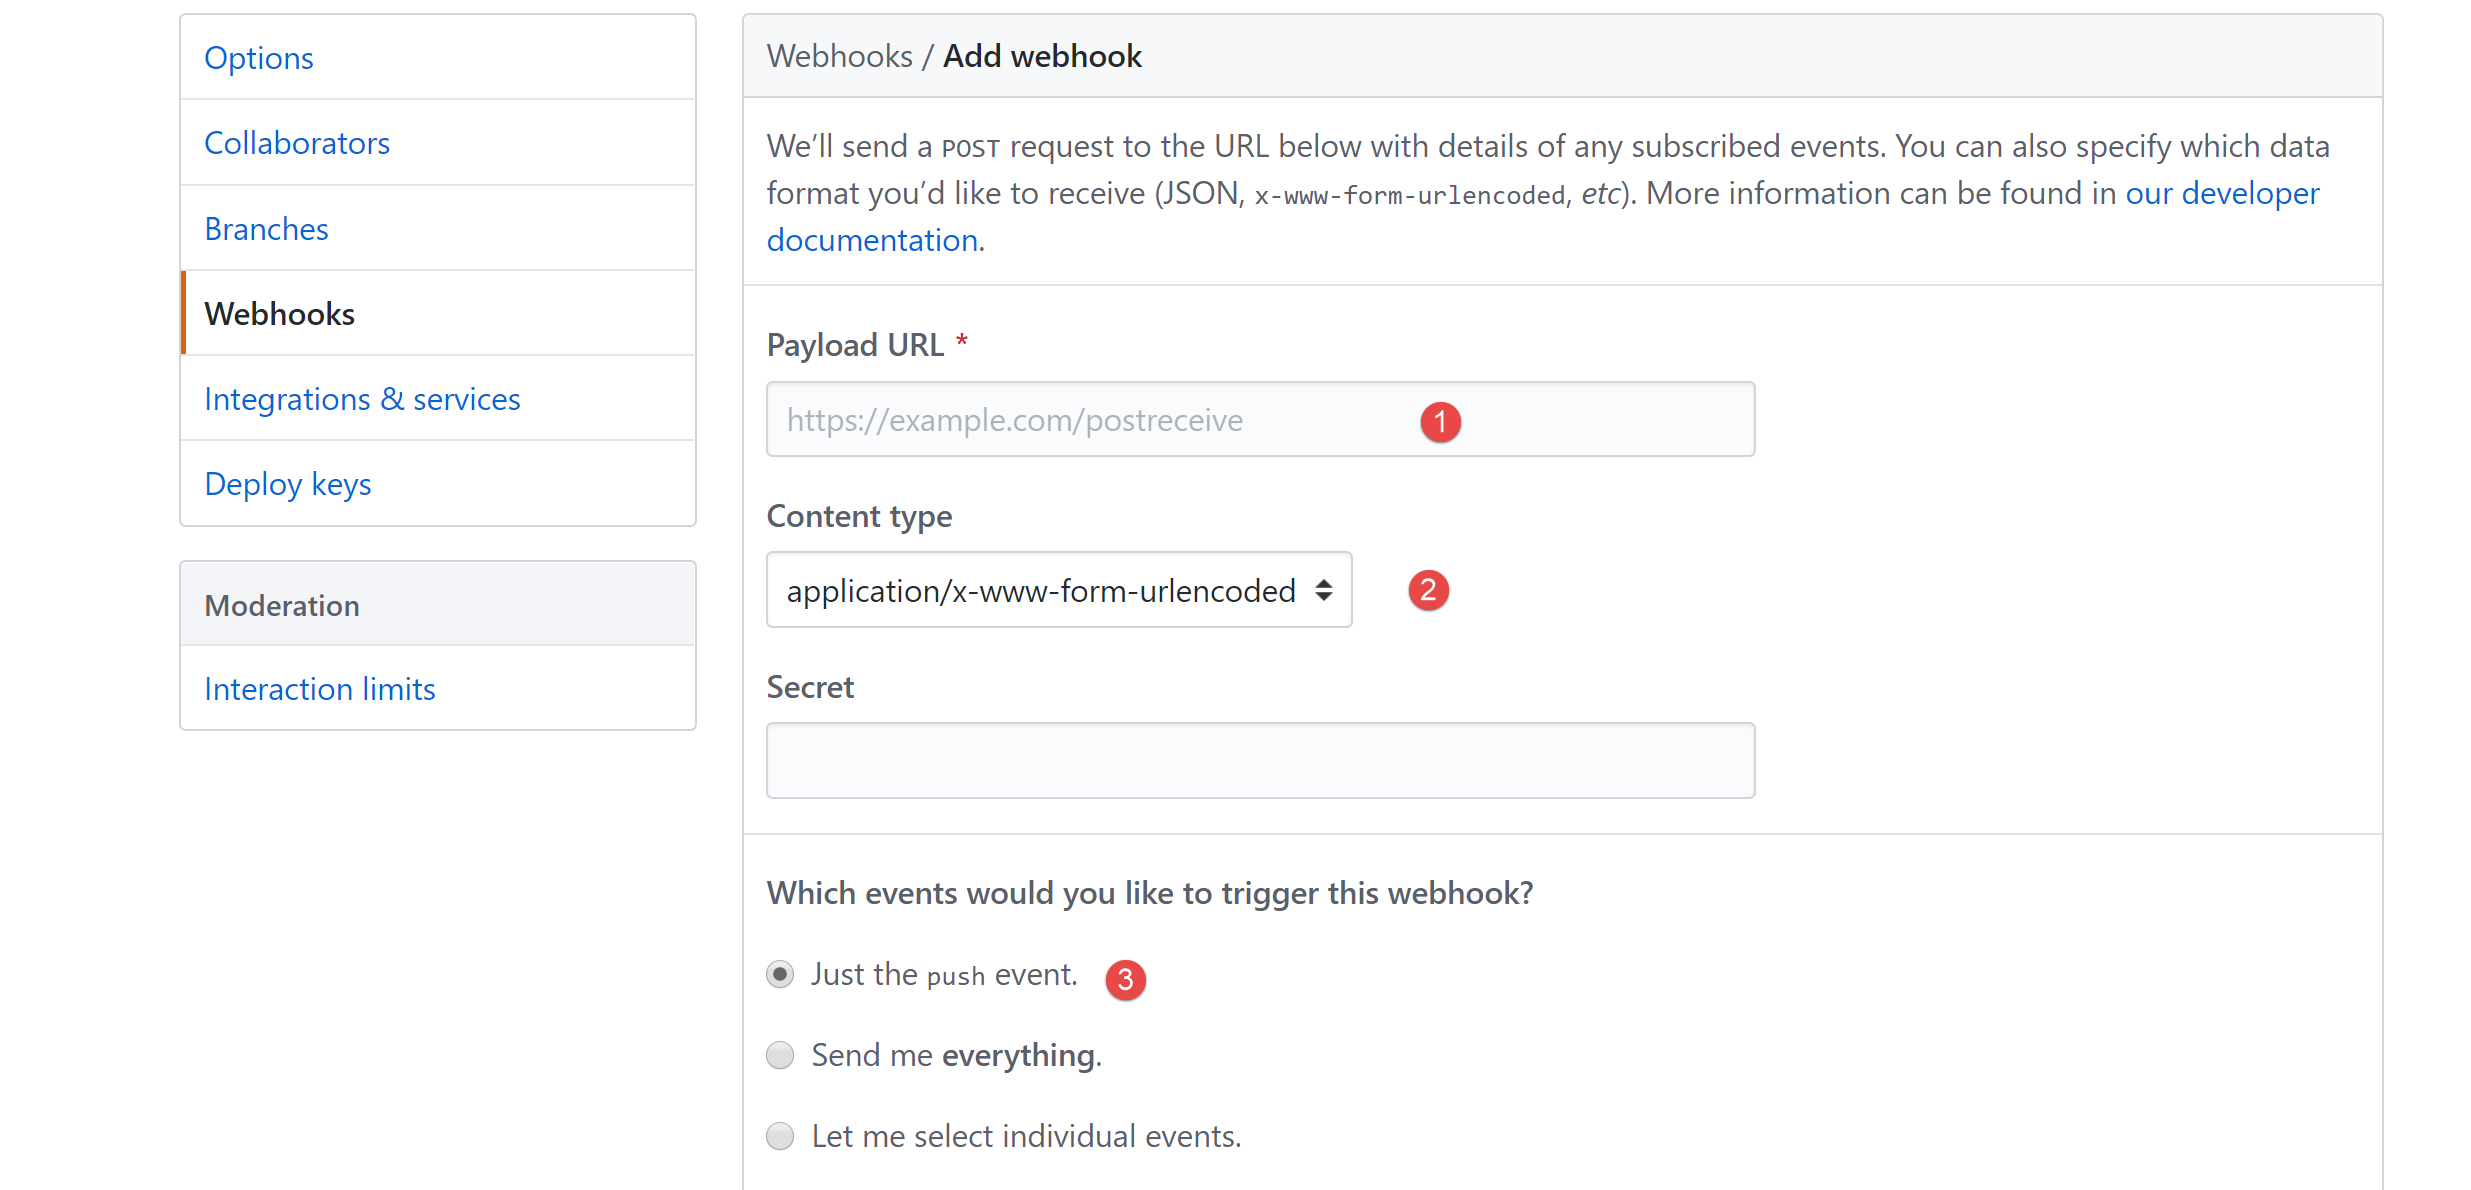
Add the following three updates:
Add a payload URL. This URL will be used to send data back to your Jenkins server. An example would be http://<my-jenkins-server-name>:8080/github-webhook/
Content Type should be application/json
Which events would you like to trigger with this webhook? Select the Just the push event option
Leave the rest of the options as their default values and click Add Webhook. Your webhook should now be listed in the webhook section (where you get taken when you click on the Webhooks menu option).
Setting up the Personal Access Token
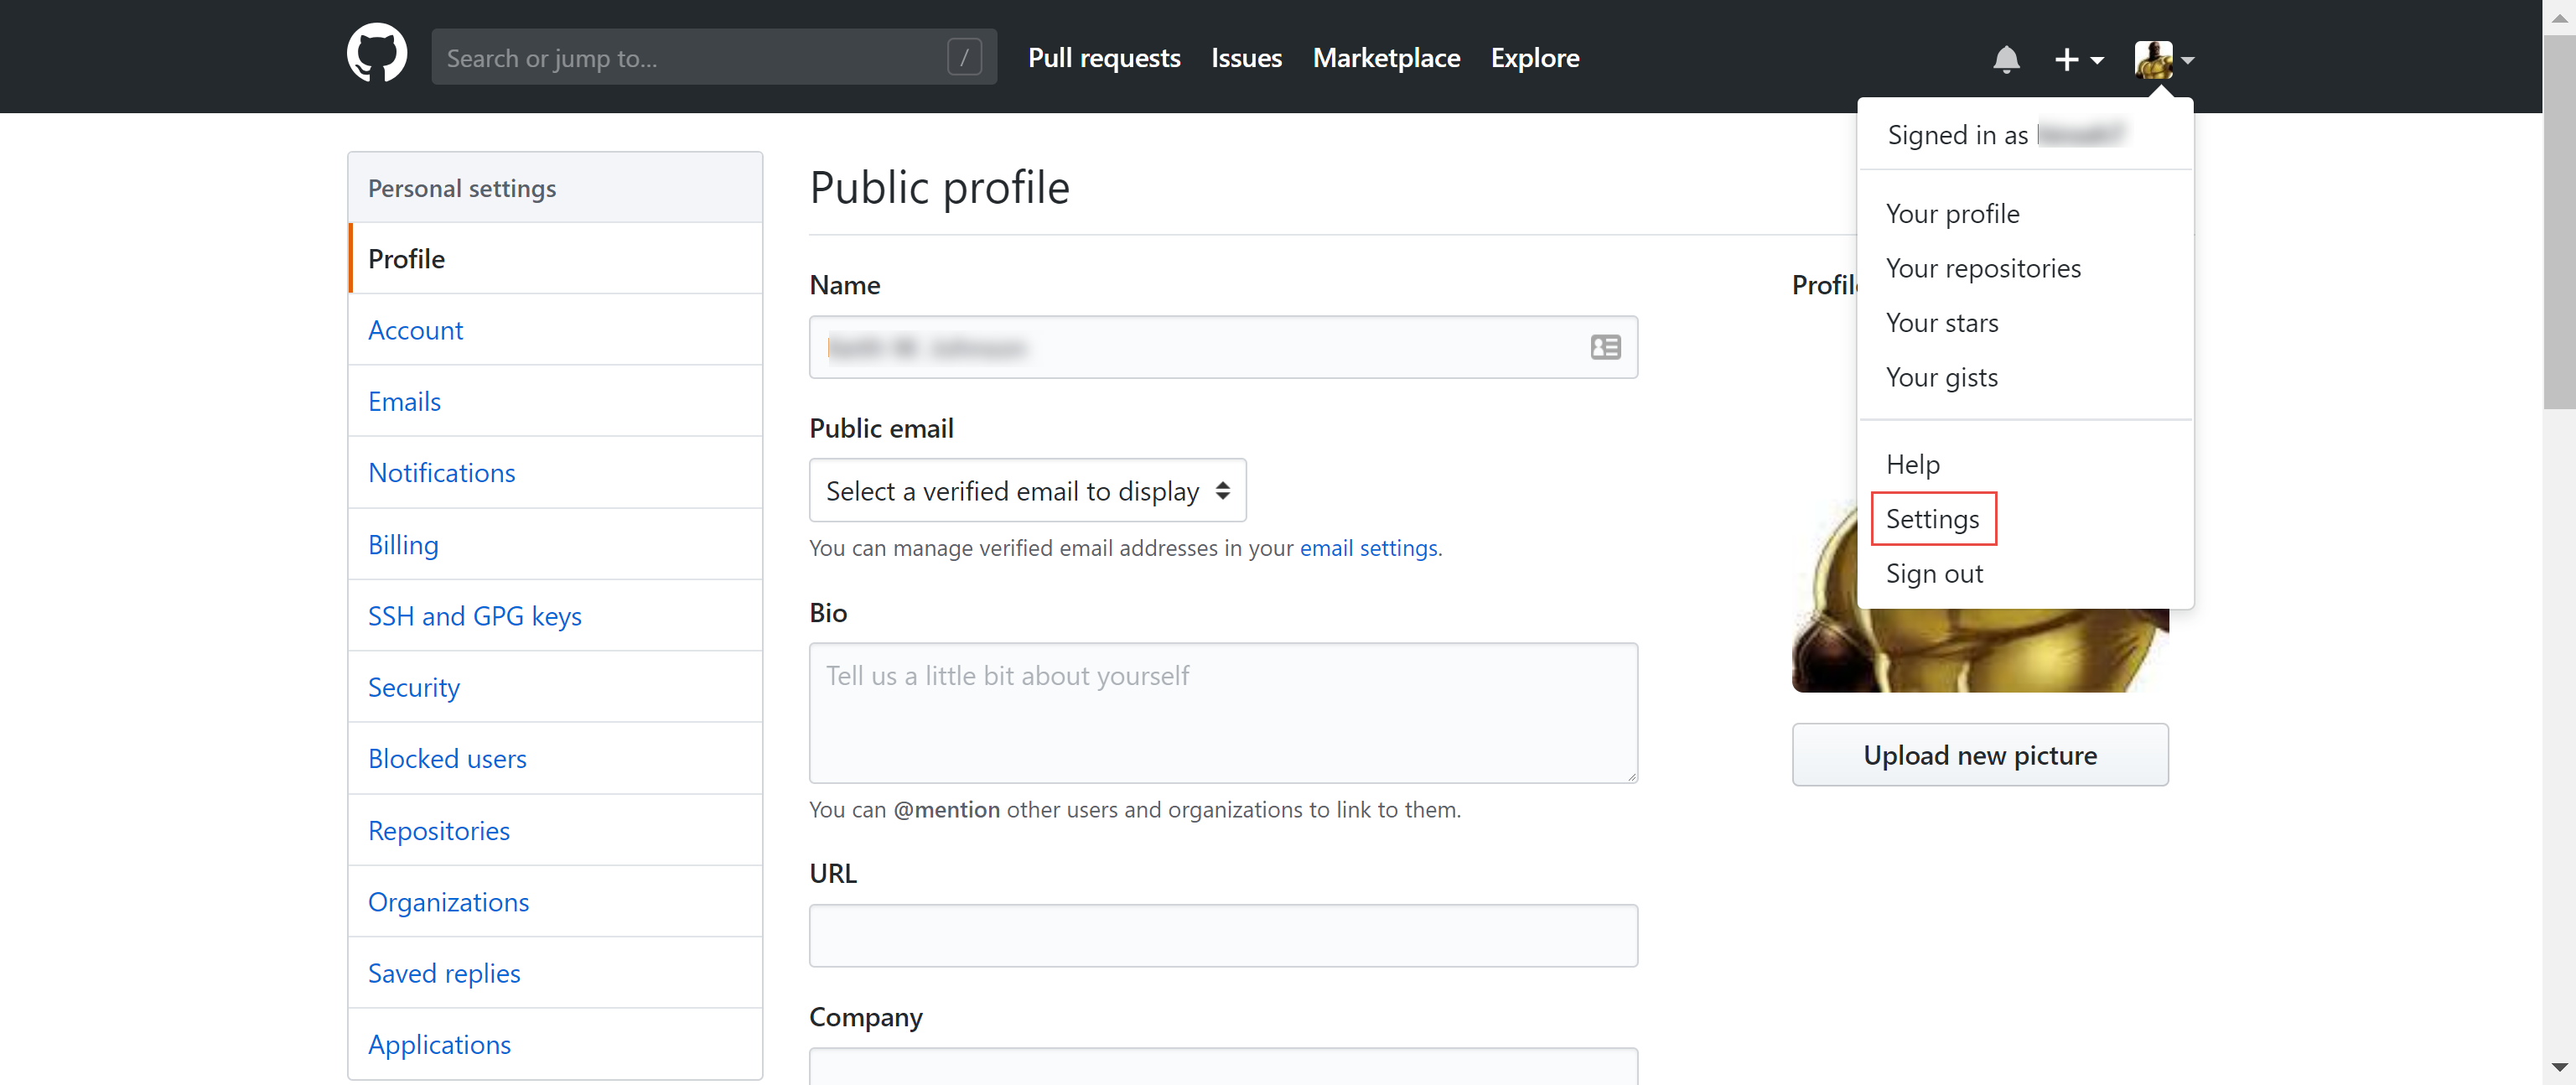
Now we’ll set up the personal access token that Jenkins needs go interact with data pushed from GitHub. To do this, go to your GitHub user drop-down menu and select Settings
Then from the left-hand menu bar, select Developer Settings and from Developer Settings, select Personal Access Tokens. On the Personal Access Tokens page, click Generate New Token.
This finally gets you to the Generate New Token page
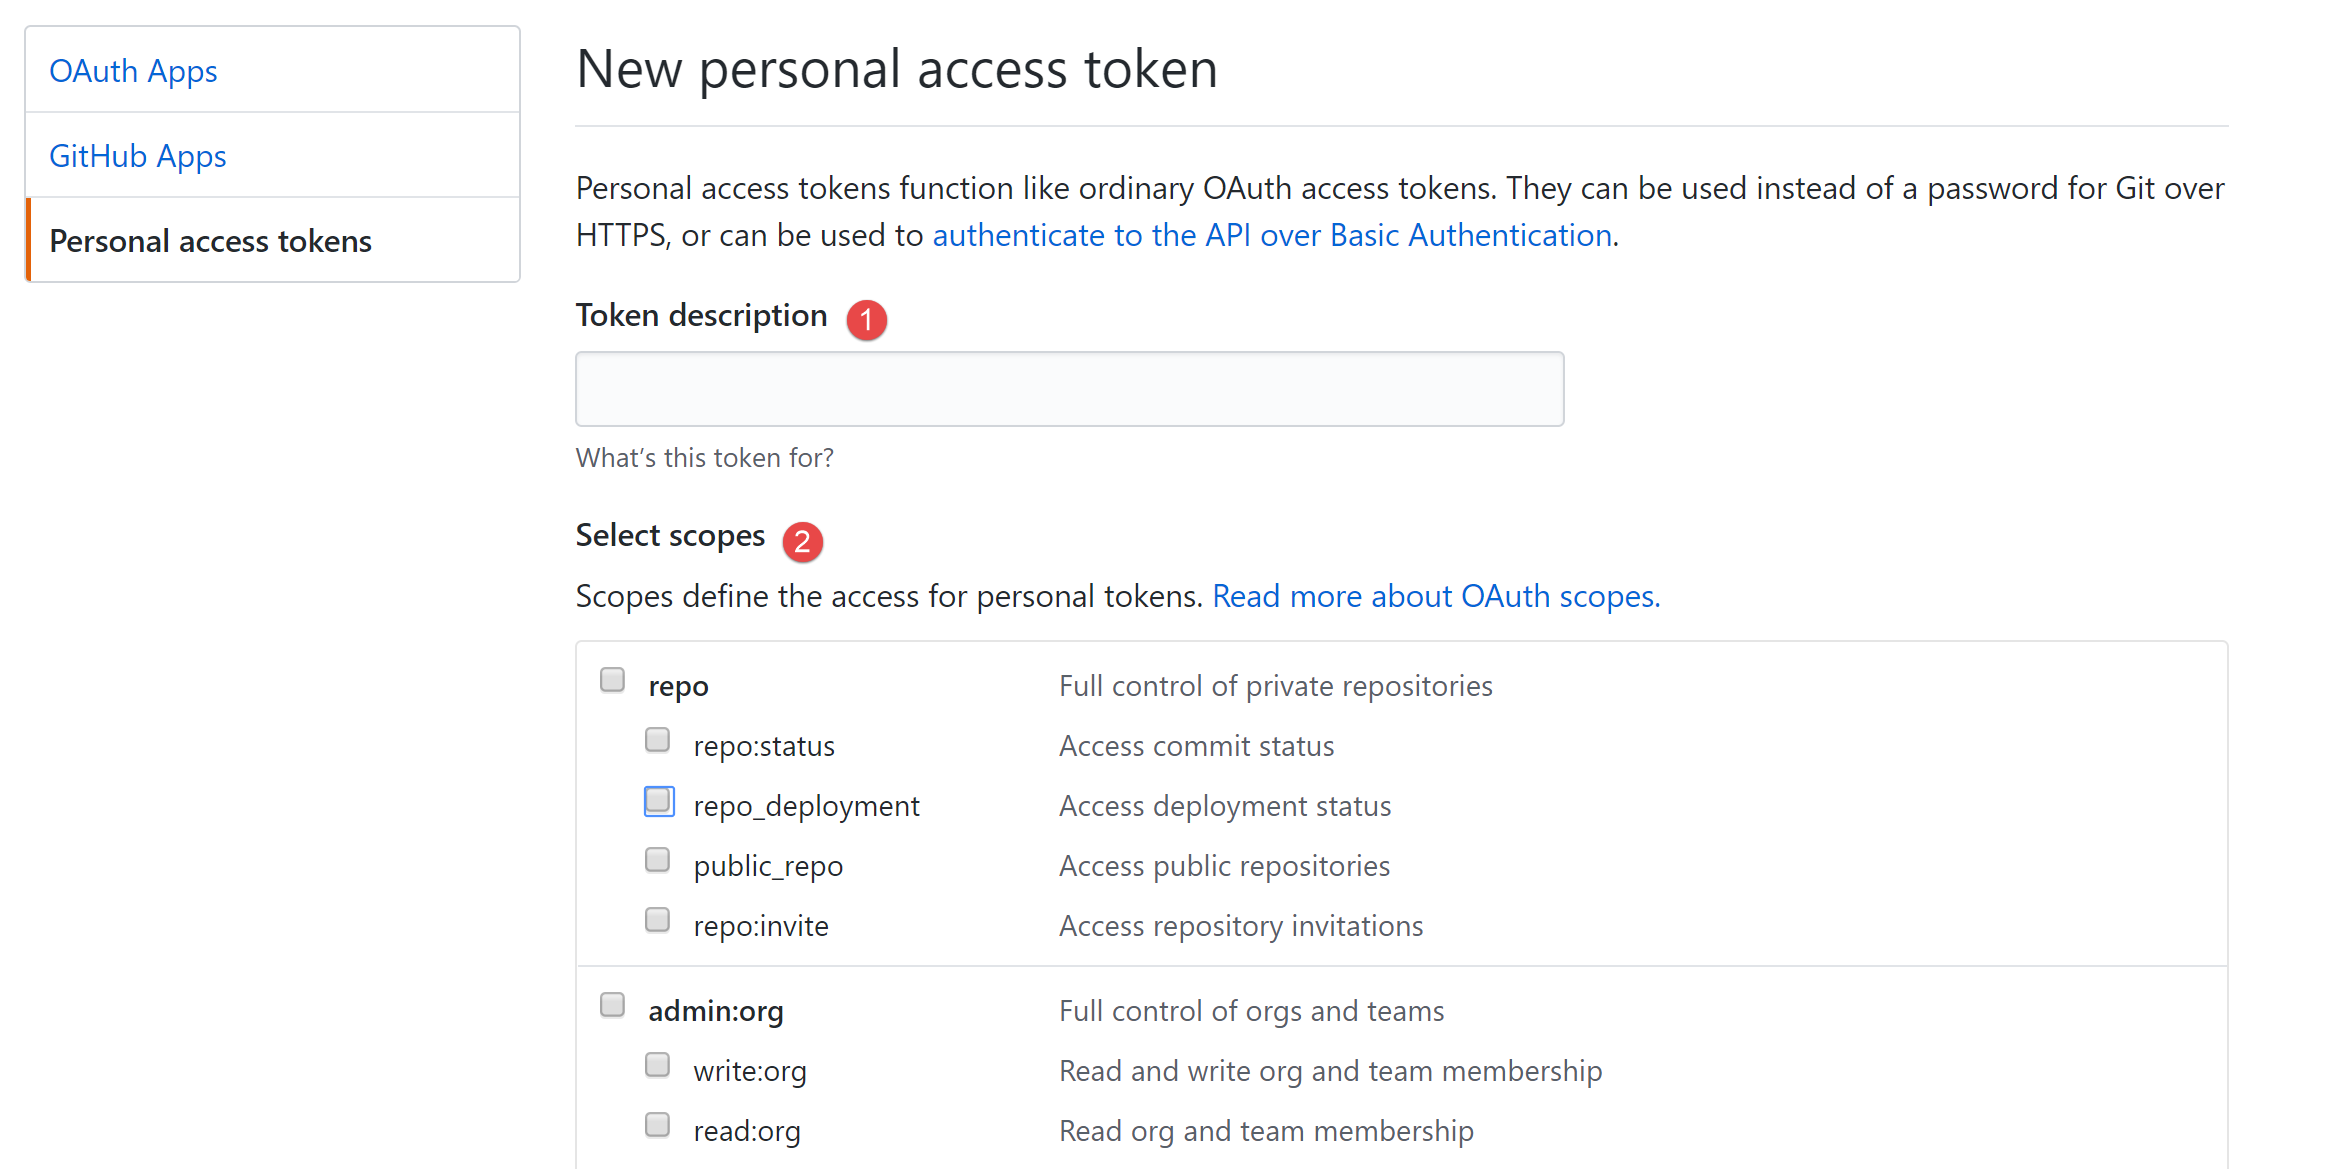
Update as follows:
Add a good description like Master Jenkins Dev Server. The description is helpful as you’ll likely have many of these tokens for many different applications
Select the authorization scopes. These are particularly important to get right for the integration to work successfully. For Jenkins authorizations you’ll need the following:
Repo (select the top options so all the sub-options get selected as well)
admin:org_hook
admin:repo_hook (select the top options so all the sub-options get selected as well)
With the updates made, click on Generate Token and copy your new token string.
Warning
As the GitHub warning indicates after you generate your token, you must copy the token at that point as you won’t be able to see it again. If you fail to do so, your only recourse is to regenerate the token.
With these GitHub updates done, it’s now time to do similar updates in Jenkins.
Jenkins Updates
First you need to confirm that you have the GihHub Plugin installed. You can either check or download the plugin from the Manage Jenkins->Manage Plugins option on the main Jenkins dashboard. Once the plugin has been confirmed/installed, click on Manage Jenkins->Configure System.
The GitHub plugin will enable a new section called GitHub Servers. In this section, click on Add GitHub Server and add the following:
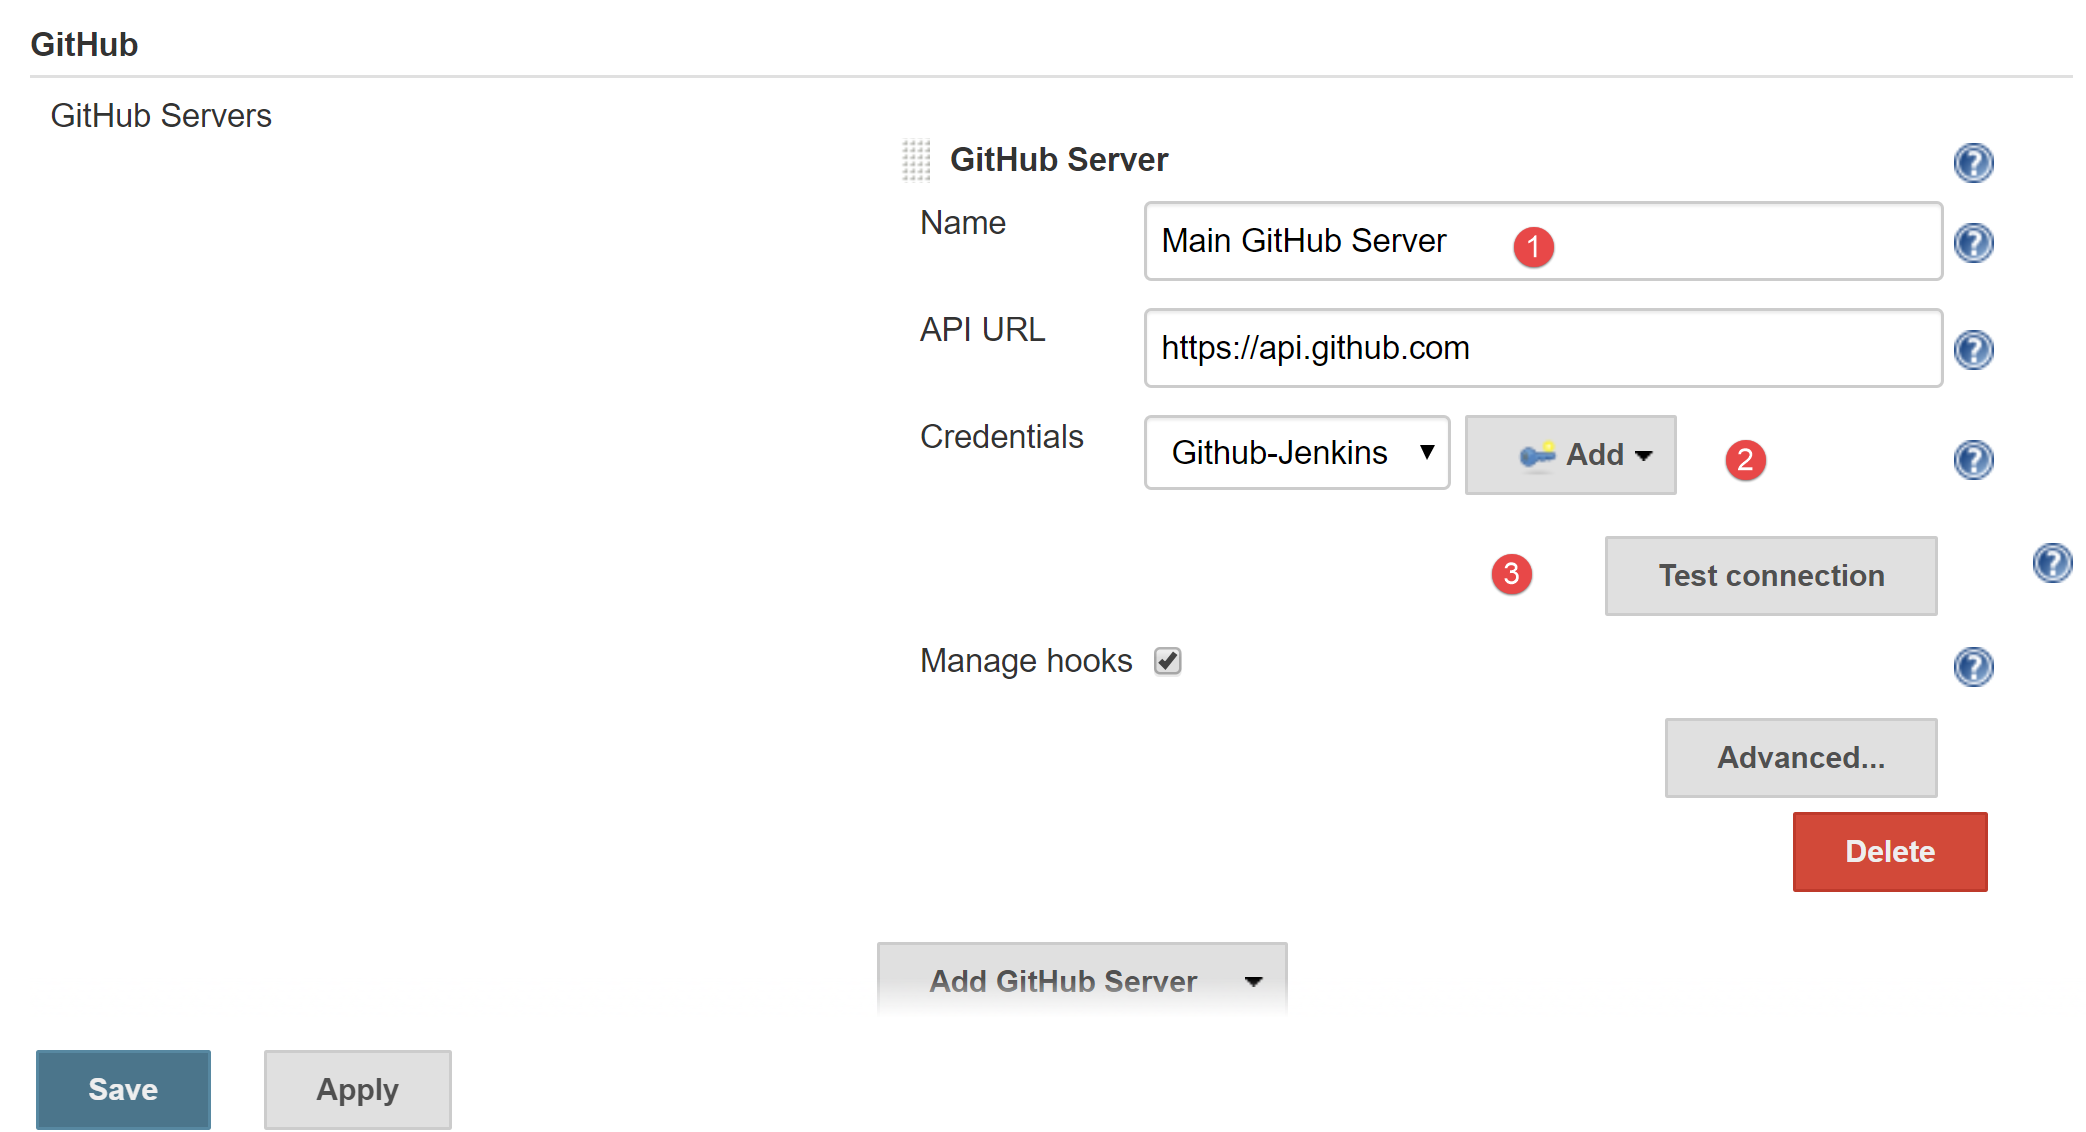
Fill in the server name
The API URL should already be defaulted to https://api.github.com, if not add this
For Credentials click the Add button and select the Jenkins option to specify new credentials:
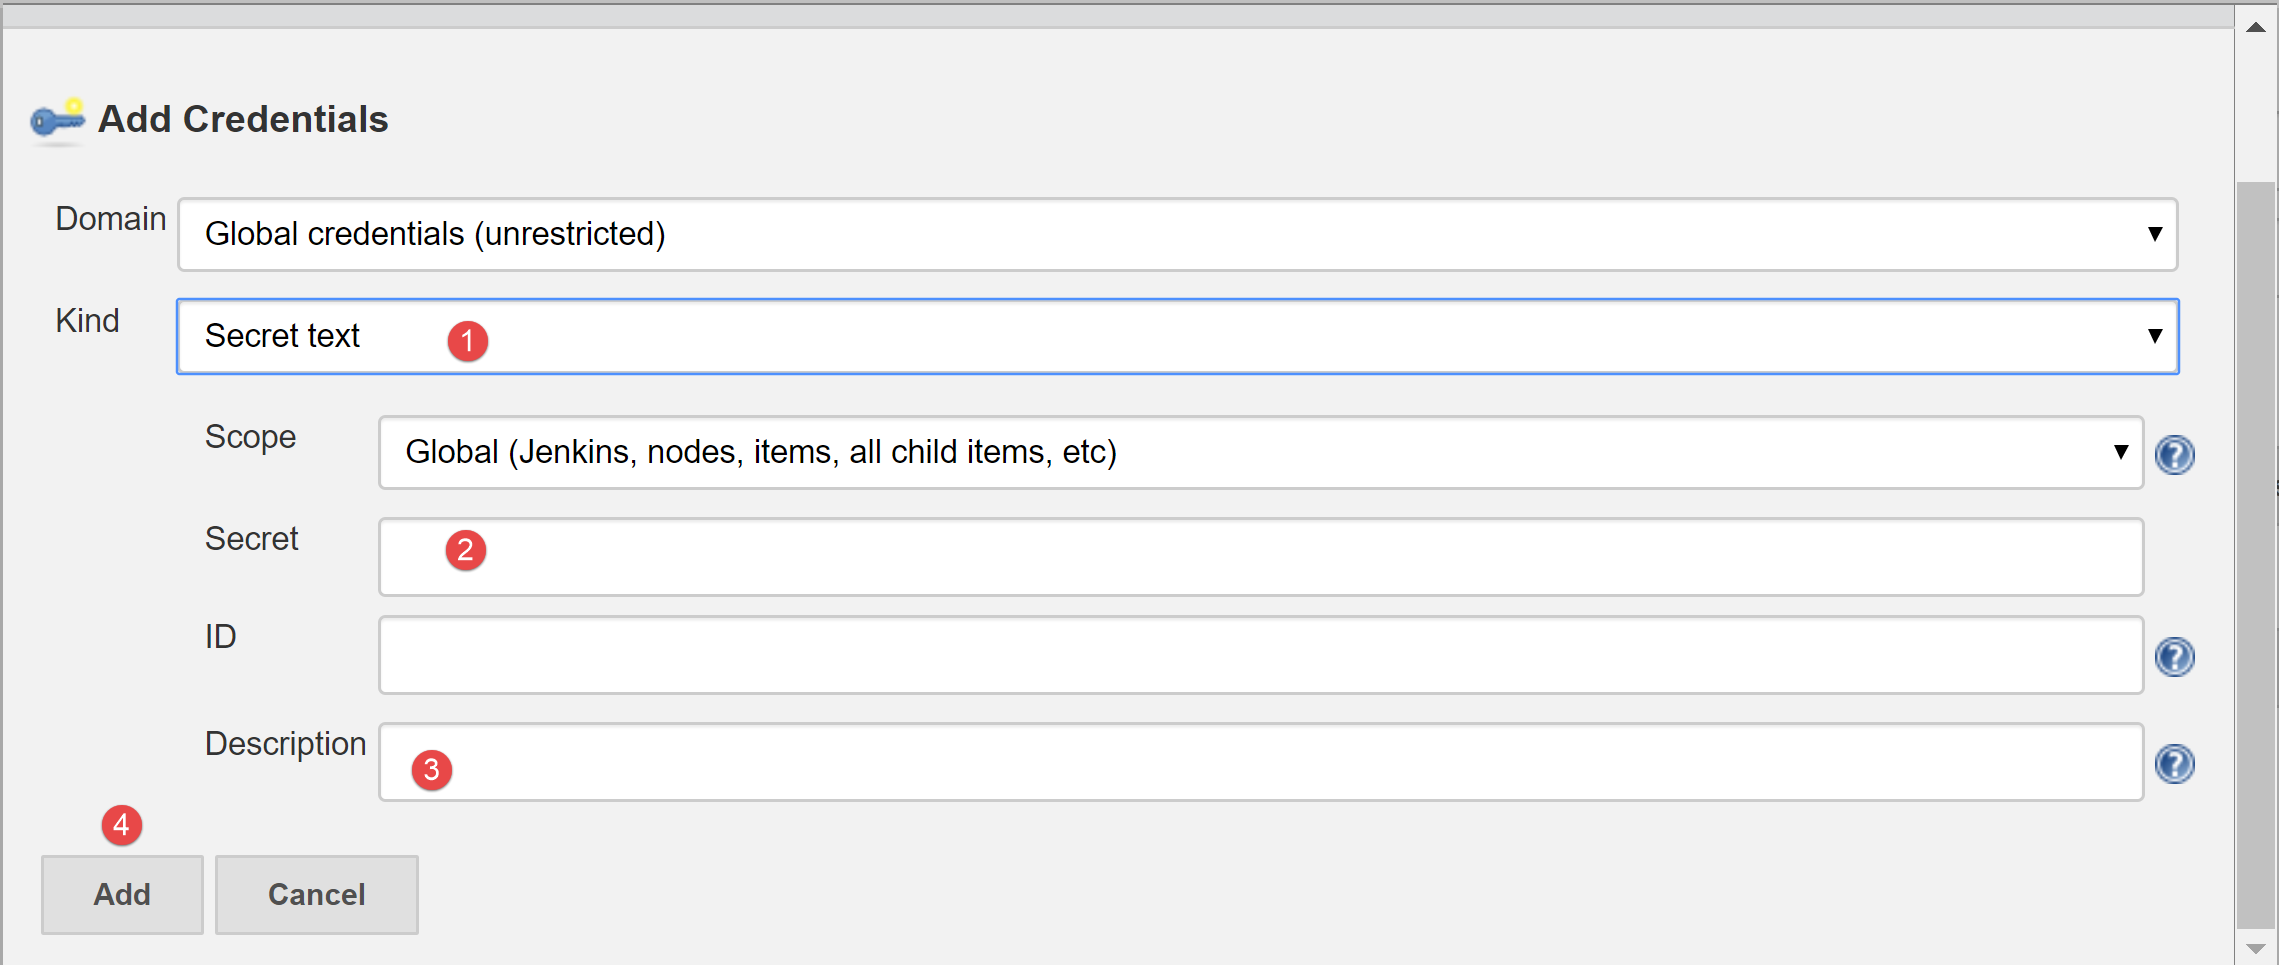
In the Kind drop-down, select Secret Text
In the Secret text box, paste in the GitHub personal access token previously you created and copied
In the Description text box, add an appropriate description for this credential
Click the Add button
This takes you back to the Add GitHub Server section. Now in the Credentials section, your newly saved credential should be available in the drop-down box. Select it and then click the Test Connection button. If all went well, you’ll see a message similar to the following:
Credentials verified for user <jenkins_user_name>, rate limit: 4998
Finally, ensure that the Manage Hooks option is checked. This should happen by default but check to be sure. Finally, click Save to save your changes.
The final integration step is to tie in your project Jenkins job back to GitHub. In your job, click on Configure. In the Configure dialog’s General tab, check GitHub Project and in the Project URL text-box, copy in your GitHub project URL (e.g. https://github.com/hirosh7/jspwiki/).
In the Build Triggers tab, check the GitHub hook trigger for GITScm polling option, then save the changes.
That should be it. Now when you push a commit to your GitHub project, the corresponding Jenkins job should get kicked off automatically. Getting this behavior configured right is a serious pain, but the reward of auto-builds is worth it. If at first you don’t succeed, try, try again (and again). You’ll eventually get it.
Troubleshooting
Obviously, there’s a lot that can go wrong with so many updates to two different systems. Helpfully, each Jenkins job page has a menu option called GitHub Hook Log
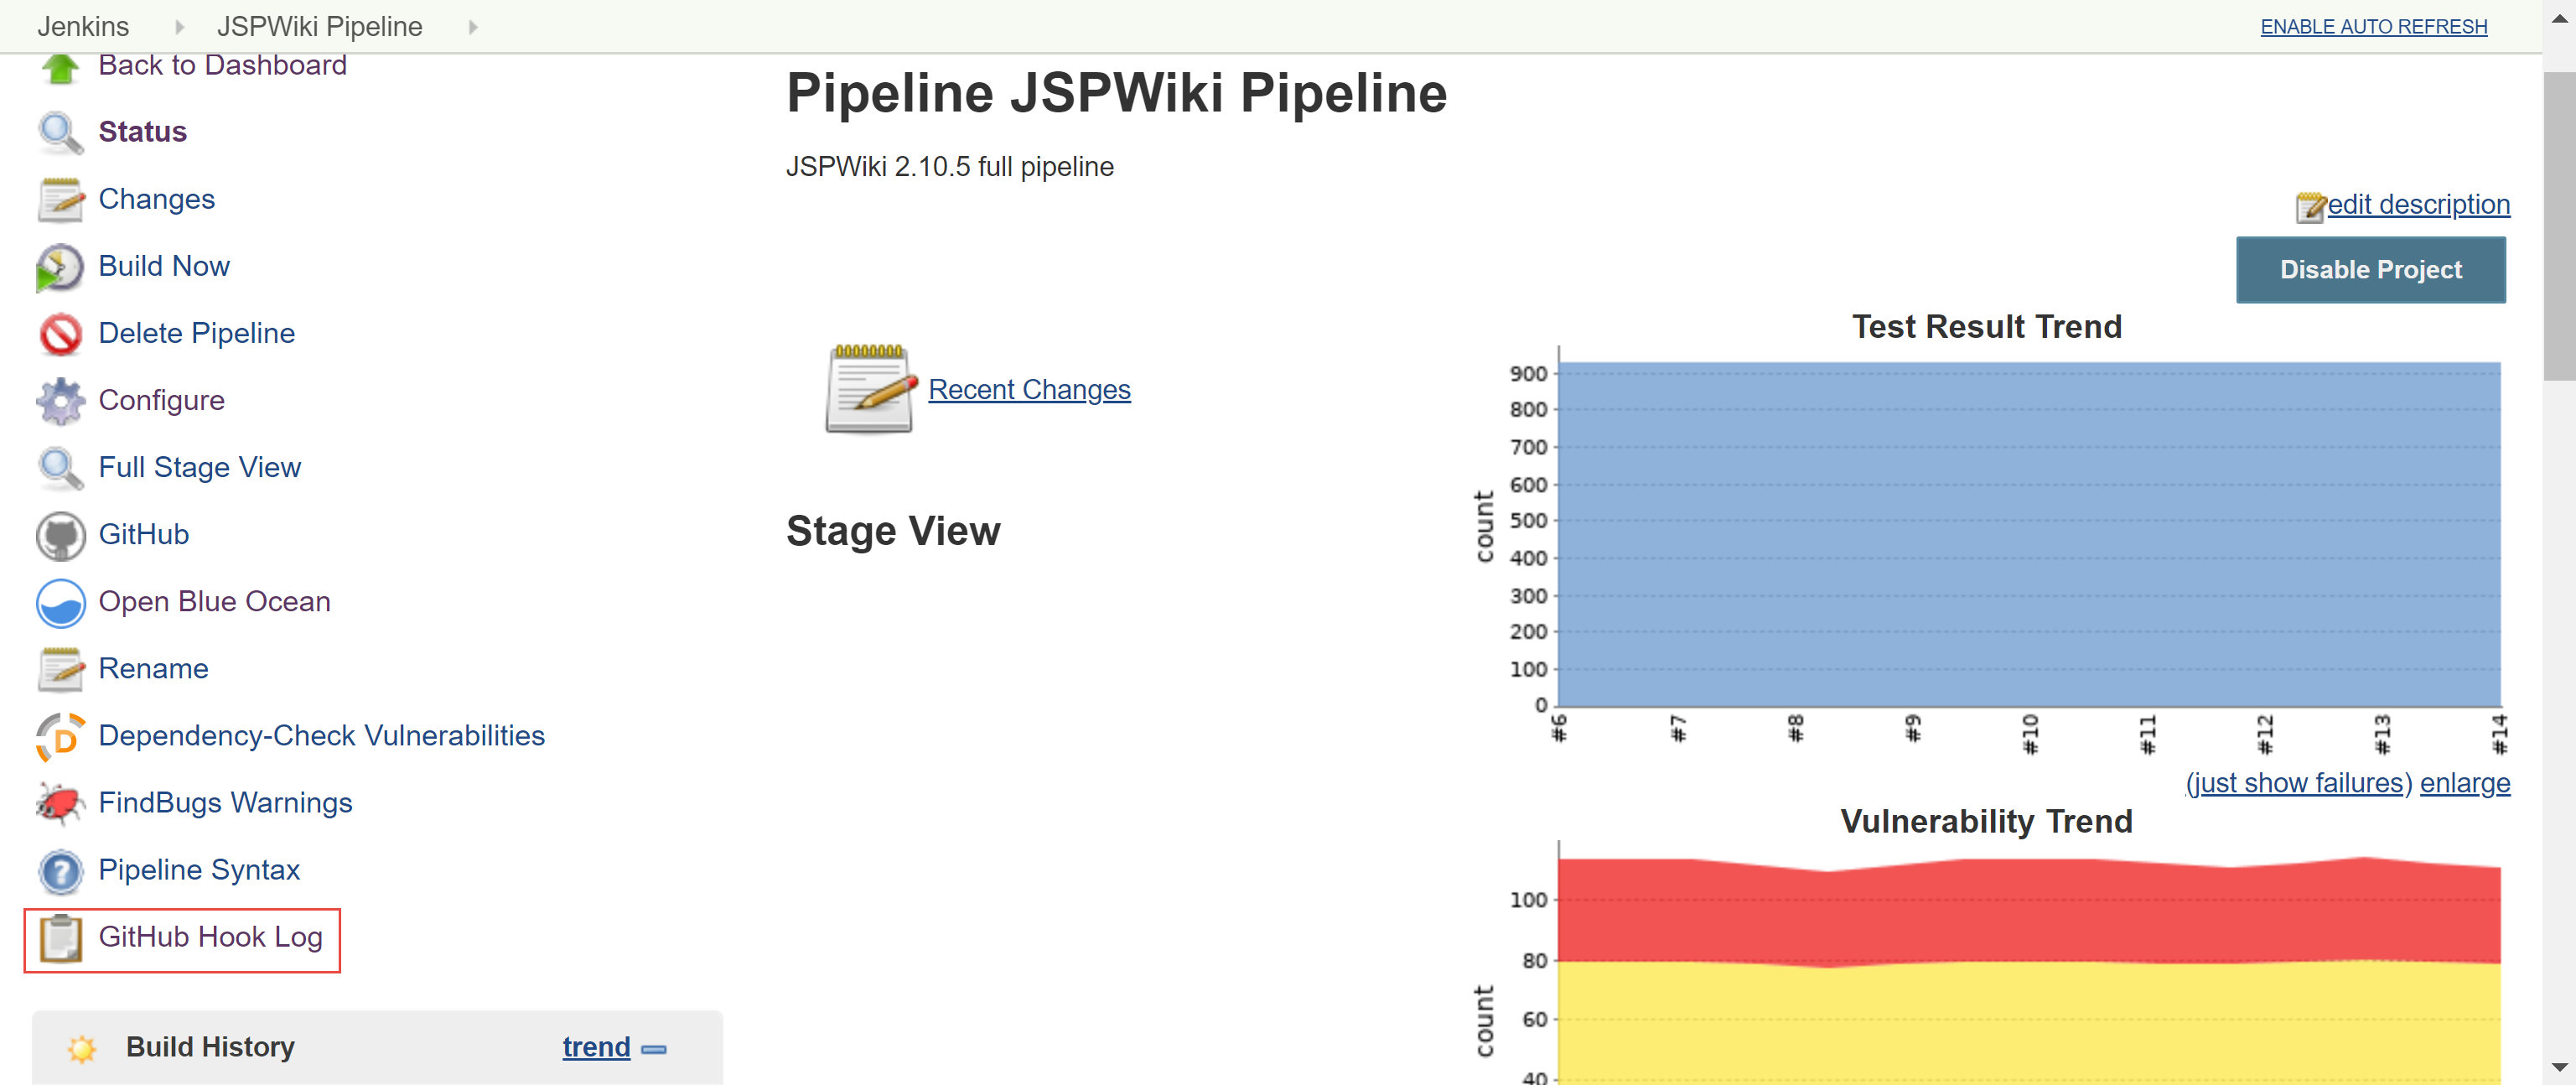
If your hook fails to run, you can get a clue as to why by checking this log. Normally it comes down to not providing your personal access token with the right authorization scope.