Findbugs / Jenkins Integration
Configure Findbugs Plugins
Working from the Jenkins Tutorial .
First step is fulfill the prerequisites:
The project you are analyzing must be structured with maven configuration files - check
FindBugs is configured in its root pom.xml - okay, work to do
When you hit the Step #2 link above, it provides a XML snippet of what to add to the existing project pom.xml. In this case we’re still working with the simple-maven-java-app but the new test version saved under ~/IdeaProjects/gerrit-projects/demo-project. The sample XML code looks like this:
<!-- SpotBugs Static Analysis -->
     <plugin>
         <groupId>com.github.spotbugs</groupId>
         <artifactId>spotbugs-maven-plugin</artifactId>
         <version>3.1.1</version>
         <configuration>
             <effort>Max</effort>
             <threshold>Low</threshold>
             <failOnError>true</failOnError>
             <includeFilterFile>${session.executionRootDirectory}/spotbugs-security-include.xml</includeFilterFile>
             <excludeFilterFile>${session.executionRootDirectory}/spotbugs-security-exclude.xml</excludeFilterFile>
             <plugins>
                 <plugin>
                     <groupId>com.h3xstream.findsecbugs</groupId>
                     <artifactId>findsecbugs-plugin</artifactId>
                     <version>LATEST</version> <!-- Auto-update to the latest stable -->
                 </plugin>
When I tried to cut and paste this I ran into some issues with IntelliJ that seemed to indicate I needed to:
Turn on auto-import (which it asked me to do automatically)
Insert the initial <plugin></plugin> XML tags using the IntelliJ capability. For the initial tags, place the cursor in the existing XML where you want to insert the tags, the righ-click to bring up the context menu and select Generate…. This will bring up a sub-menu. Here select Plugin Template and it will pop it in with the associated groupID, artifactID and version tags.
Cut and paste the sample code into the appropriate spots. Once inside the auto-generated <plugin></plugin> tags you can manually create the other tags and IntelliJ will automatically generate the closing tags.
With the update integrated and saved, test it out with the following commands:
# In the project directory (where you newly modified pom.xml is located)
mvn compile
mvn findbugs:findbugs
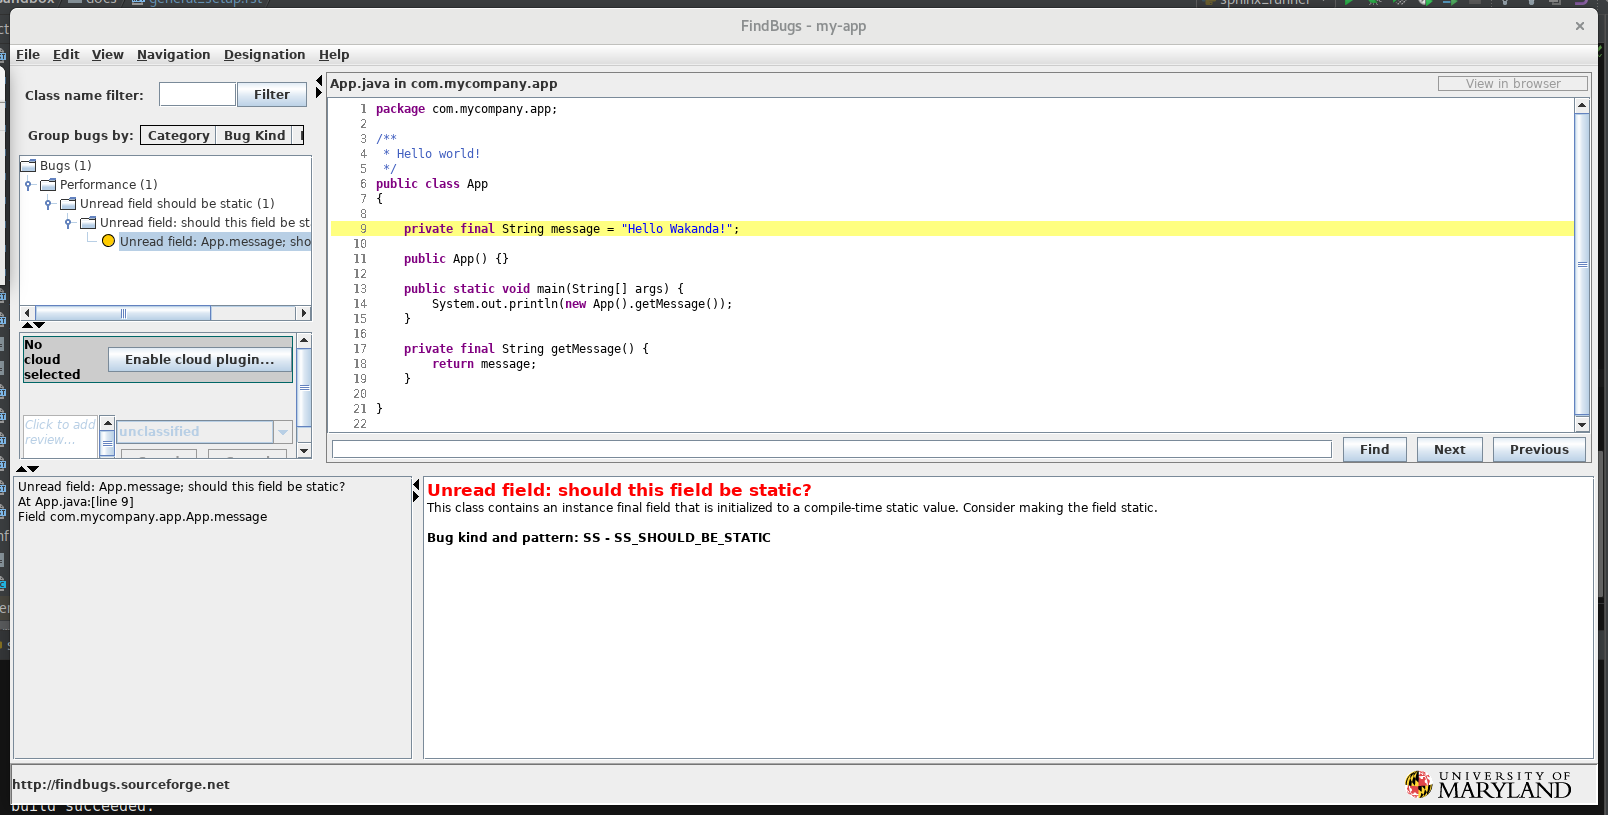
# If all that goes well bring up the findbugs GUI and check out your one bug
mvn findbugs:gui
With this working properly, we now return to the Jenkins integration portion of the tutorial. First step here is download the FindBugs Plug-in into Jenkins via Manage Jenkins->Manage Plugins. Confirm that the static analysis collector plugin was also downloaded with the FindBugs Plug-in. With the appropriate plugins installed, the last step is to add the extra required configurations to your existing pipeline job.
Here the instructions mention, checking the “Publish FindBugs analysis results” option in the Build Settings section. This action presumes we’re using a Jenkins Maven project, but we are using a Jenkins Pipeline project so we need to take a different approach to publishing the findbugs results after the findbugs analysis.
To implement findbugs publishing in a pipeline script, do the following:
Go to the Jenkins Dashboard and click on your target job. In this case, this would be the Gerrit-Demo-Project job
In the left-hand command list, click on the Pipeline Syntax hyperlink to open up the pipeline syntax window
What we want to do is add another step to our ‘SCA’ stage in our Jenkinsfile. The pipeline syntax page will help generate the exact command we need to paste in. So, in the Steps section, click the drop-down dialog prefaced with the text Sample Step. In this drop-down, scroll down and select the step: General Build Step option.
This shows another drop-down dialog box prefaced with the text Build Step. In this drop-down, scroll down and select the Publish Findbugs analysis results option.
This opens up a text box prefaced with the text FindBugs Results. In here, copy the text **/findbugsXml.xml
Note
The note below the ‘FindBugs Results’ text box mentions that it’s possible the findbugs.xml file can take a couple forms (e.g. findbugs.xml or findbugXml.xml, etc.). In order to determine the target file name, I looked in the Jenkins container. In my setup I ran the command docker exec -i -t Jenkins_Master /bin/bash where Jenkins_Master is the name of my container. Next, You’ll note that the docker-compose.yaml file lists the volume jenkins_home:/var/jenkins_home. So in the container, I found my FindBugs results XML file under /var/jenkins_home/workspace/Gerrit-Demo-Project/target/. In my case the file name was findbugsXml.xml.
Note
If you want to configure more FindBugs options, click on the Advanced button. Here you can set things like status thresholds, health thresholds, etc. I left these alone, but if I wanted to have the build fail based on the number and/or severity of defects found, that can be configured here
Next, click on the Generate Pipeline Script button to do just that. The appropriate pipeline syntax for your FindBugs result publishing step will appear. Copy that text
Now, edit your project Jenkinsfile and paste this new step in the ‘SCA’ stage. The result should look similar to the code snippet below
stage('SCA') {
 steps {
     sh 'mvn findbugs:findbugs'
     findbugs canComputeNew: false, defaultEncoding: '', excludePattern: '', healthy: '',
     includePattern: '', isRankActivated: true, pattern: '**/findbugsXml.xml', unHealthy: ''
 }
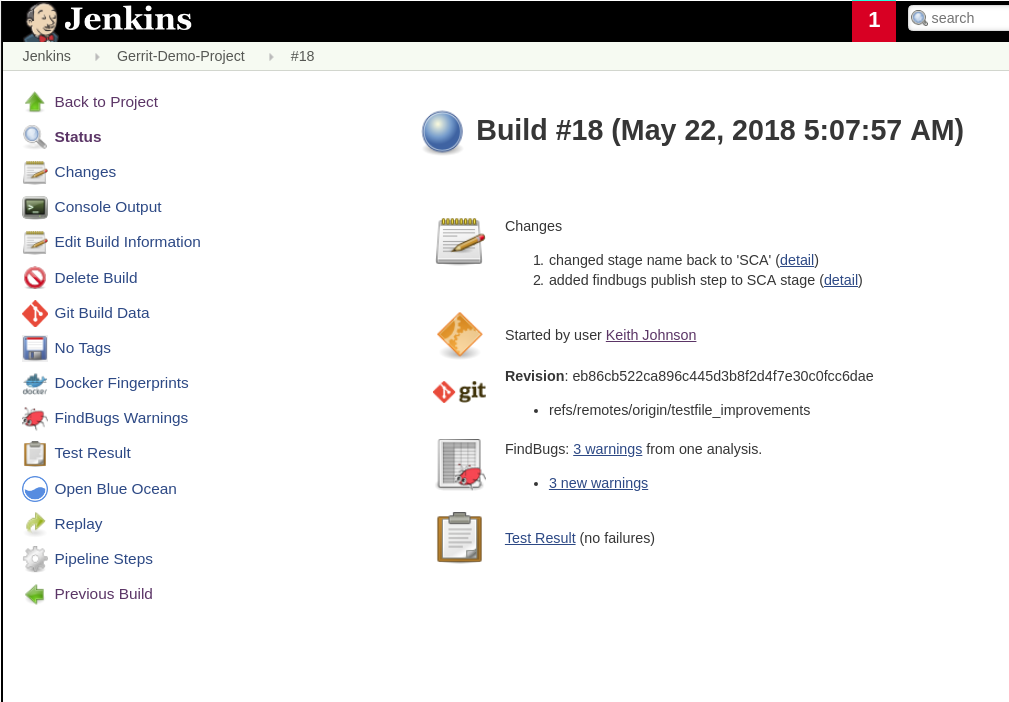
Commit and push this Jenkinsfile change and re-run the Gerrit-Demo-Project job. Once the build completes, click on the job build # hyperlink (e.g. #18) under the Last Success column which takes you to the build results page. On this page, you’ll sections for your FindBugs results and your test results. Yummy goodness.