Kubernetes Overview
Once your cluster is set up, you’ll want to be able to interact with the nodes(VMs)/containers providing your service. Information in the section is pulled from the`Kubernetes.io Tutorials <https://kubernetes.io/docs/tutorials/kubernetes-basics/explore-intro/>`_
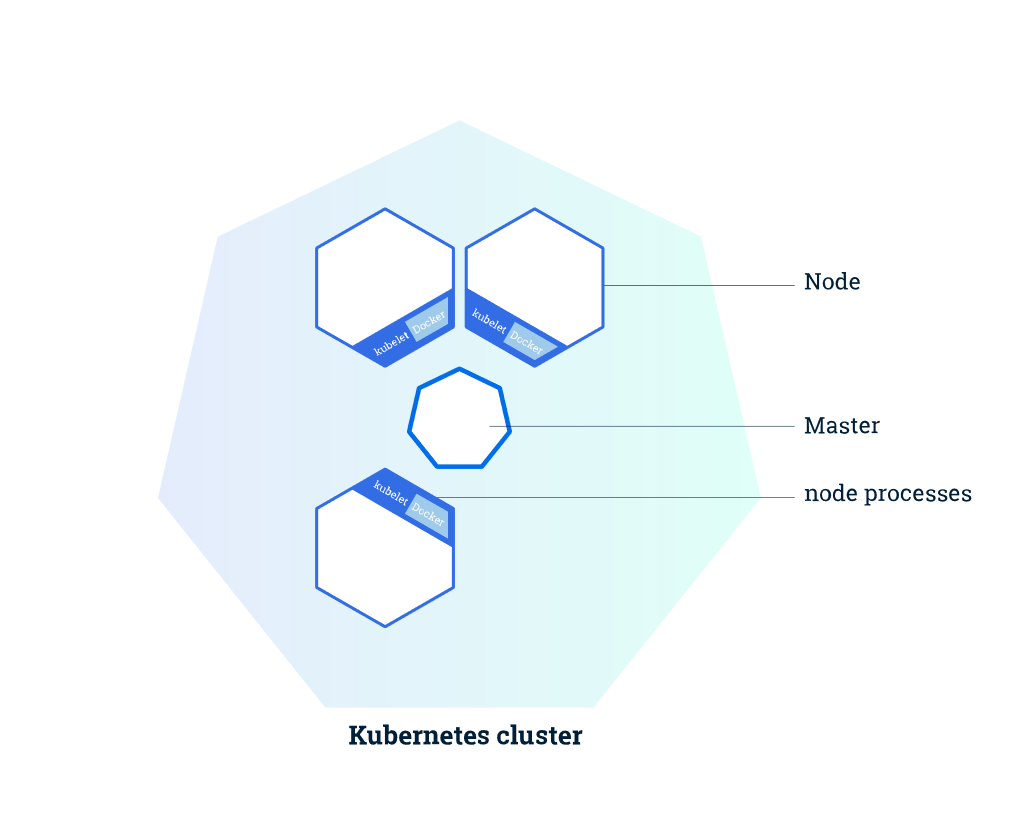
Kubernetes Cluster
The Master is responsible for managing the cluster. The master coordinates all activities in your cluster, such as scheduling applications, maintaining applications’ desired state, scaling applications, and rolling out new updates.
A node is a VM or a physical computer that serves as a worker machine in a Kubernetes cluster. Each node has a Kubelet, which is an agent for managing the node and communicating with the Kubernetes master. The node should also have tools for handling container operations, such as Docker or rkt. A Kubernetes cluster that handles production traffic should have a minimum of three nodes.
When you deploy applications on Kubernetes, you tell the master to start the application containers. The master schedules the containers to run on the cluster’s nodes. The nodes communicate with the master using the Kubernetes API, which the master exposes. End users can also use the Kubernetes API directly to interact with the cluster.
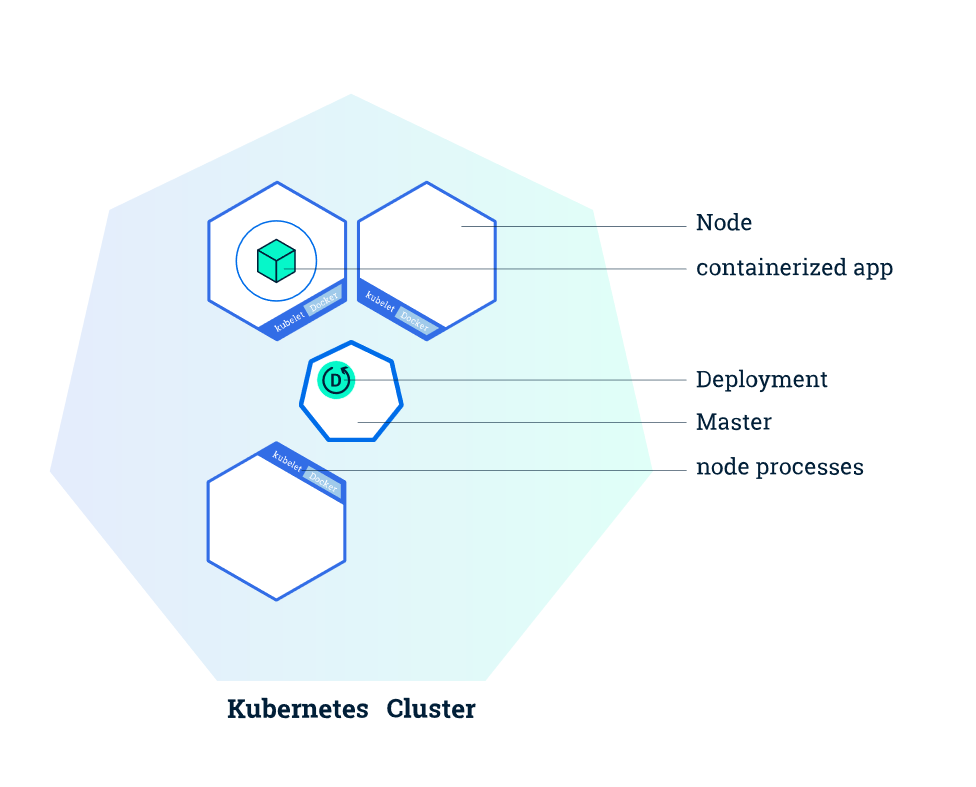
Deployments
Once you have a running Kubernetes cluster, you can deploy your containerized applications on top of it. To do so, you create a Kubernetes Deployment configuration. The Deployment instructs Kubernetes how to create and update instances of your application. Once you’ve created a Deployment, the Kubernetes master schedules mentioned application instances onto individual Nodes in the cluster.
Once the application instances are created, a Kubernetes Deployment Controller continuously monitors those instances. If the Node hosting an instance goes down or is deleted, the Deployment controller replaces it. This provides a self-healing mechanism to address machine failure or maintenance.
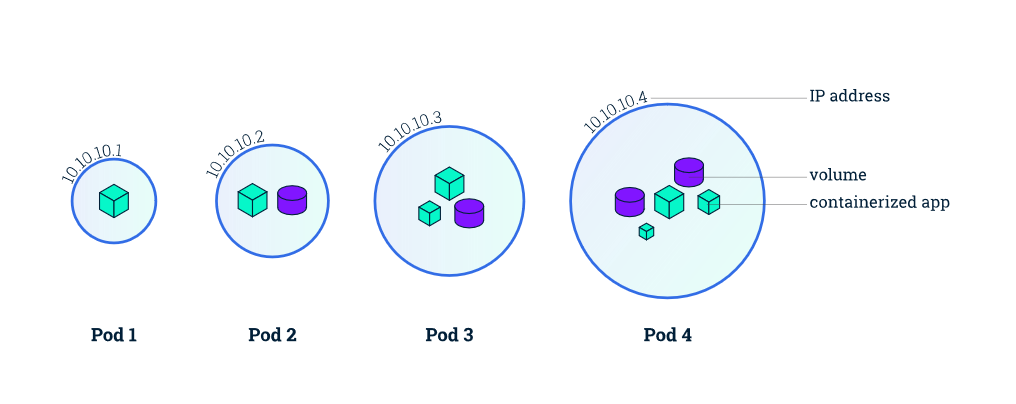
Pods Overview
A Pod is a group of one or more application containers (such as Docker or rkt) and includes shared storage (volumes), IP address and information about how to run them.
Pods are the atomic unit on the Kubernetes platform. When we create a Deployment on Kubernetes, that Deployment creates Pods with containers inside them (as opposed to creating containers directly). Each Pod is tied to the Node where it is scheduled, and remains there until termination (according to restart policy) or deletion. In case of a Node failure, identical Pods are scheduled on other available Nodes in the cluster.
Pods that are running inside Kubernetes are running on a private, isolated network. By default they are visible from other pods and services within the same kubernetes cluster, but not outside that network. When we use kubectl, we’re interacting through an API endpoint to communicate with our application.
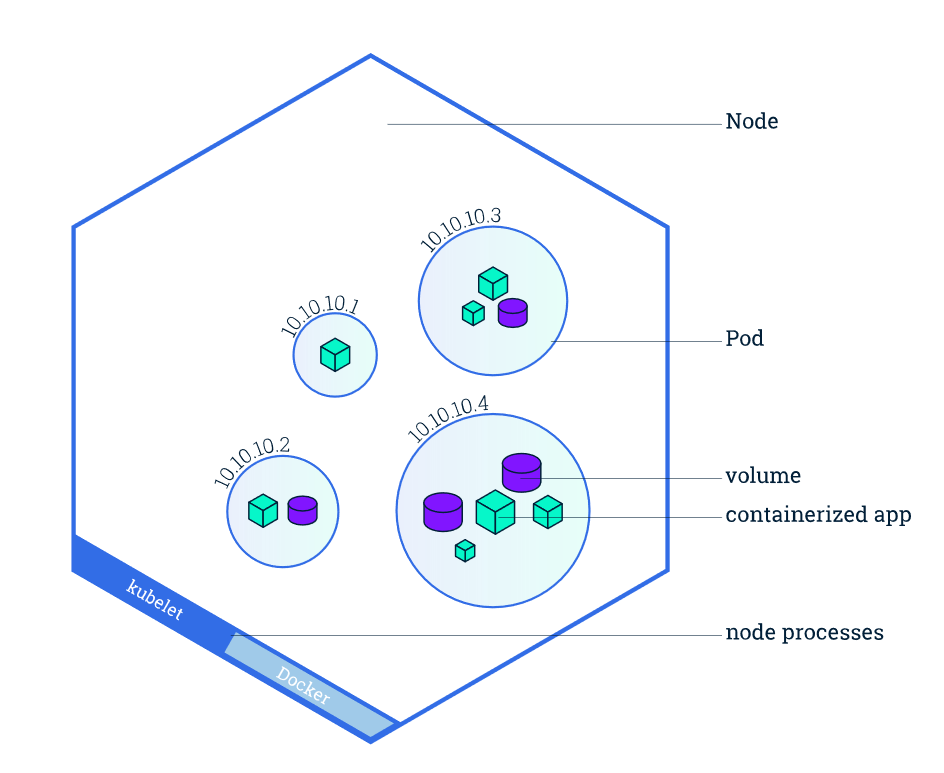
Nodes Overview
A Pod always runs on a Node. A Node is a worker machine in Kubernetes and may be either a virtual or a physical machine, depending on the cluster. Each Node is managed by the Master. A Node can have multiple pods, and the Kubernetes master automatically handles scheduling the pods across the Nodes in the cluster. The Master’s automatic scheduling takes into account the available resources on each Node.
Every Kubernetes Node runs at least:
Kubelet - a process responsible for communication between the Kubernetes Master and the Nodes; it manages the Pods and the containers running on a machine
A container runtime (like Docker, rkt) responsible for pulling the container image from a registry, unpacking the container, and running the application.
Service and Labels
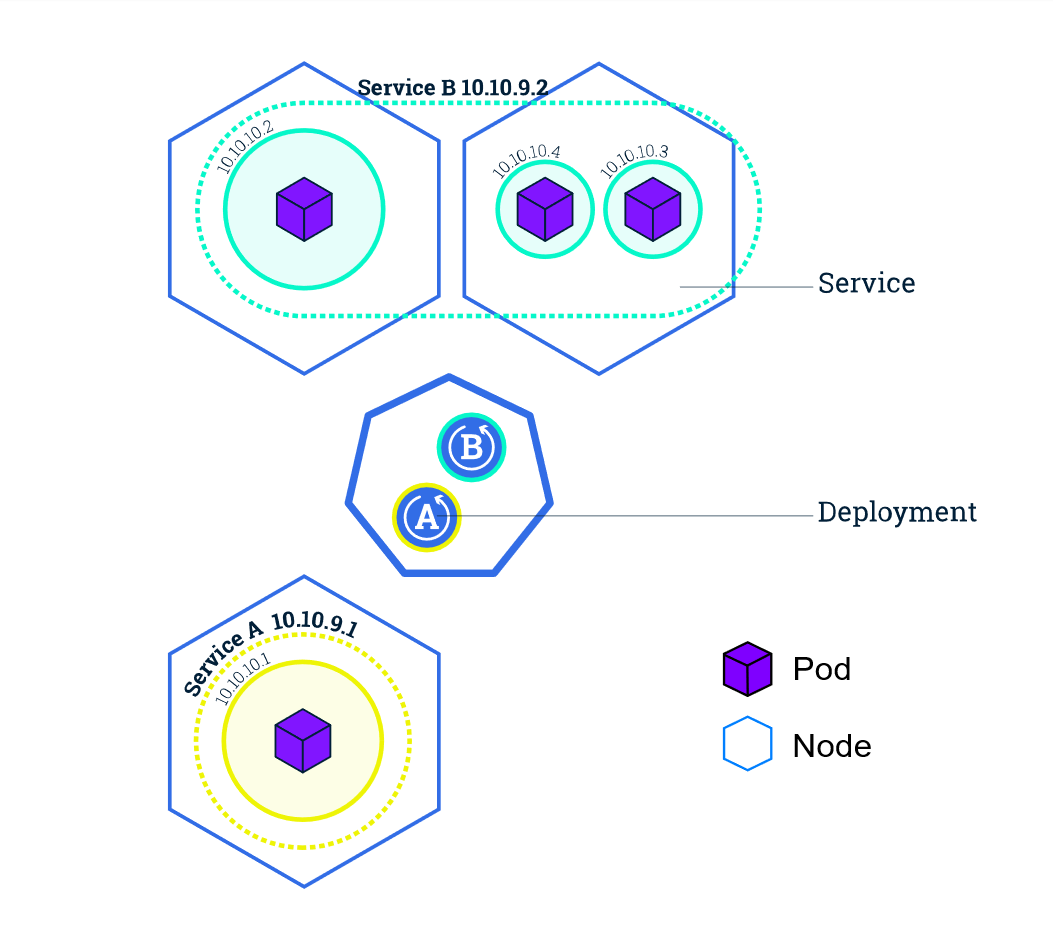
A Service routes traffic across a set of Pods. Services are the abstraction that allow pods to die and replicate in Kubernetes without impacting your application. Discovery and routing among dependent Pods (such as the frontend and backend components in an application) is handled by Kubernetes Services.
Services match a set of Pods using labels and selectors, a grouping primitive that allows logical operation on objects in Kubernetes. Labels are key/value pairs attached to objects and can be used in any number of ways:
Designate objects for development, test, and production
Embed version tags
Classify an object using tags
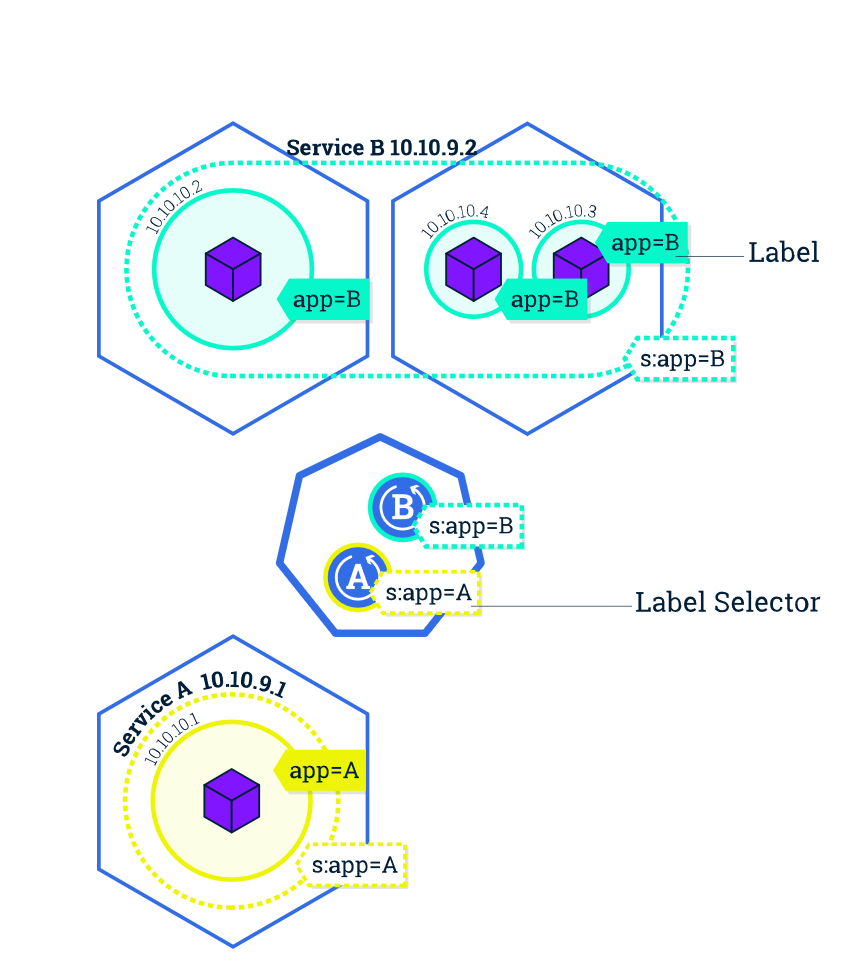
Labels can be attached to objects at creation time or later on. They can be modified at any time. Let’s expose our application now using a Service and apply some labels.
Helpful Kubernetes Commands
# List Cluster Details
> kubectl cluster-info

# Nodes nodes in the cluster
> kubectl get nodes

# List Resourceskubectl get pods -o wide
> kubectl get [pods | service | nodes | deployments] [-o wide]
> kubectl get pods -o wide # includes pod IP and host node

# Show detailed information about a resource
> kubectl describe [pods| nodes| deployments]

# Print the logs from a container in a pod
# No need to specify the container name if only one container in the pod
> kubectl logs

# Execute a command on a container in a pod
> kubectl exec <pod_name> [env]
> kubectl exec -ti <pod_name> bash # open a bash shell in the pod

# Grab a pod name and save it env var $POD_NAME
> export POD_NAME=$(kubectl get pods -o go-template --template '{{range .items}}{{.metadata.name}}{{"\n"}}{{end}}'); echo Name of the Pod: $POD_NAME

# Start a pod proxy access to interact with a pod
# Run this in a separate terminal window
> kubectl  proxy

# To see the output of a pod application
# URL is the route to the API of the pod
> curl **http://localhost:8001/api/v1/proxy/namespaces/default/pods/$POD_NAME/**

# Clean up
# Execute this command
> kubectl delete service <service_name>
# then either delete the cluster via the GUI console or via:
> gcloud container clusters delete [CLUSTER_NAME]